Alpine stitch
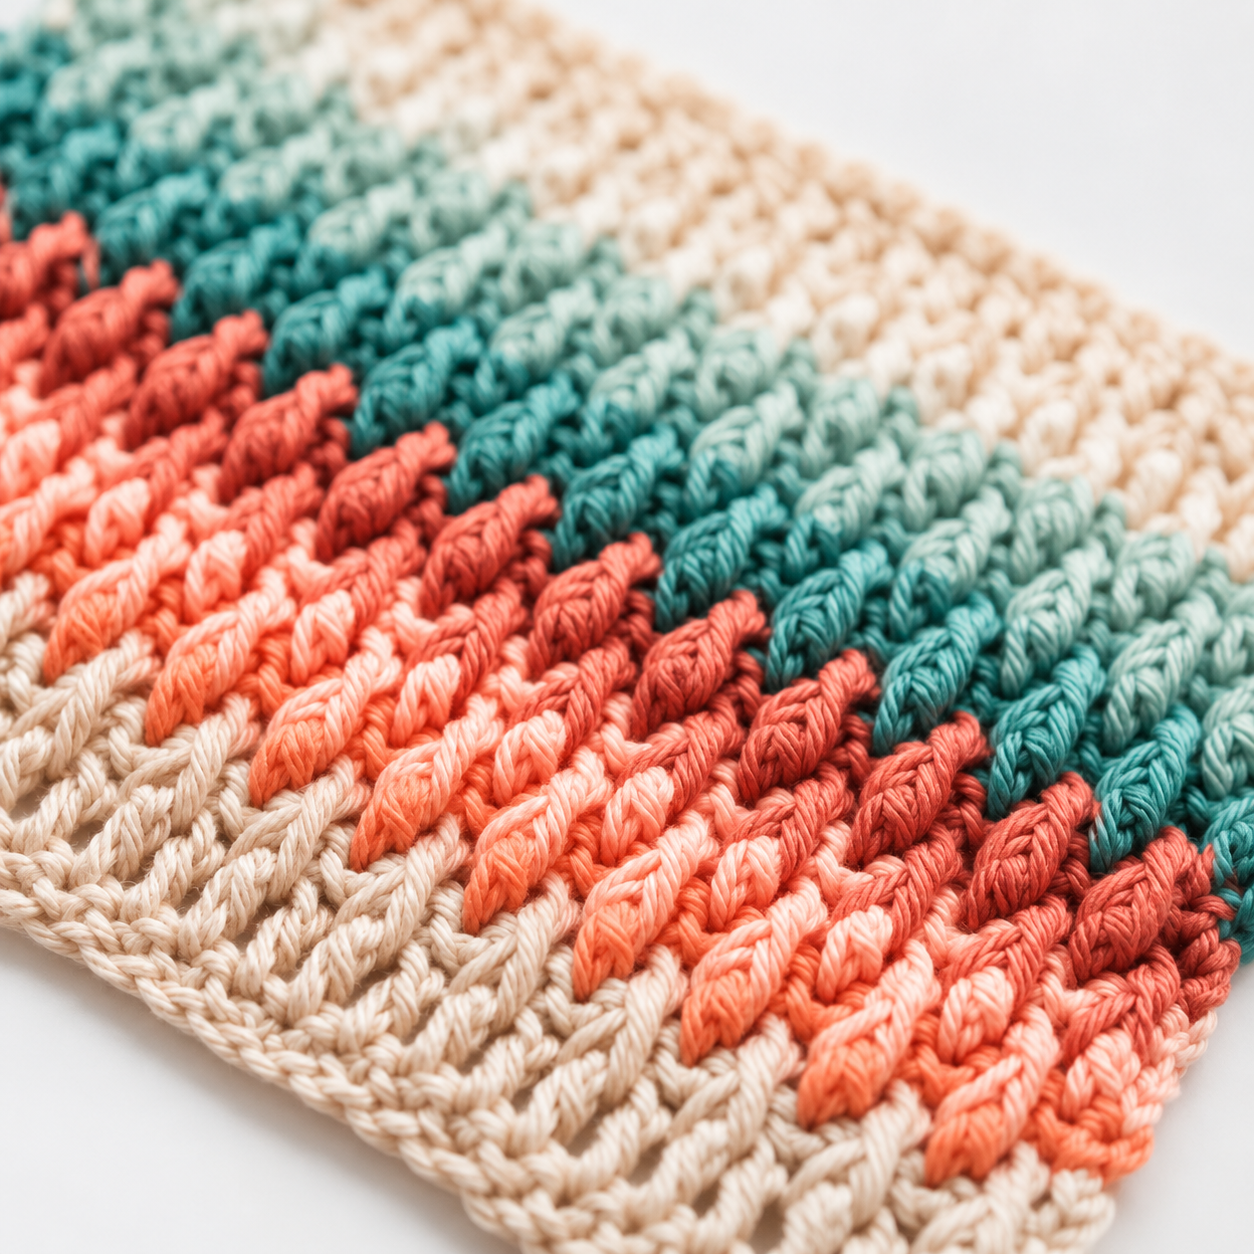
Alternating front-post and regular stitches for a textured zig-zag.
Vertical Short — phone-shaped 9:16 player.
Step by step
7 steps
- 1
Calculate stitch count
Decide your starting width as a multiple of 2 plus 1 (2n + 1) and plan a height that is a multiple of 4.
- 2
Make the base row
Join the first colour with a ss in the first st, ch 3 (counts as a dc) and work dc in each st to the end, ch 1, turn and work sc across, then cut the yarn and turn the work.
- 3
Row A — alternating FPdc and dc
Join the next colour with a ss in the first st, ch 2 (counts as first dc), then alternate: work a FPdc around the post of the next dc two rows below, then work a regular dc while skipping one st on the current row to avoid increasing, repeat to the end and finish with a hdc in the last stitch, then cut the yarn.
- 4
Row B — sc across
Ch 1, turn and work sc in each st across the row, then cut the yarn and turn the work.
- 5
Row C — offset FPdc/dc
Join the next colour with a ss, ch 2 (counts as first dc) and make a dc in the next st to offset the pattern, then alternate FPdc around the dc two rows below and dc while skipping one st on the current row, finish the row with dc then hdc in the last two sts and cut the yarn.
- 6
Row D — sc across and repeat
Ch 1, turn and work sc in each st across, cut the yarn, then repeat Rows A–D for the textured Alpine zig‑zag.
- 7
Colour gradient tip
Use at least three colours and change colours each repeat for a smooth gradient because the FPdc posts blend the colours (more colours give softer transitions).